ProjectSMM.com
Gonzo TechNet
How To Enable Server Side Includes (SSI) on IIS
If SSIs are not already enabled on your Windows server, only a server administrator can turn them on.
-
(Note:If you are running IIS on XP, you can skip to the next step)
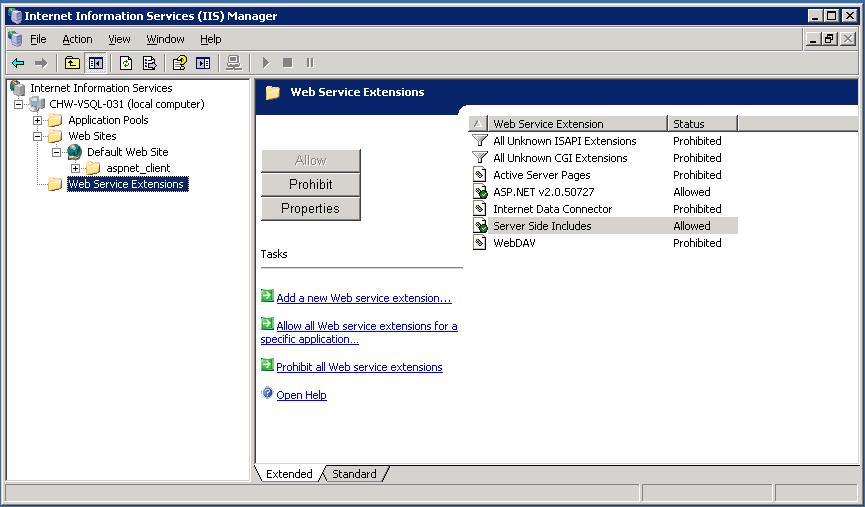
In the IIS Manager, go to "Web Service Extensions" and set server-side includes to "Allowed."
-
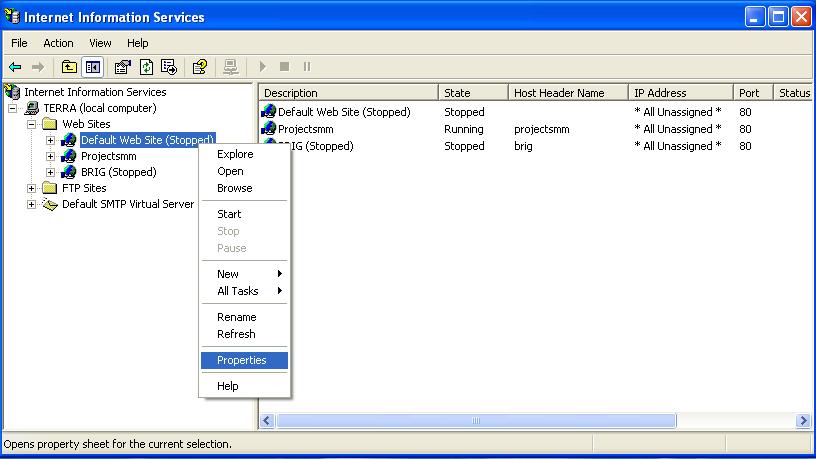
In IIS Manager, expand the local computer, right-click the "Web Sites" folder and select Properties (to enable SSI for all sites),
or
right-click a specific Web site and select Properties (to enable for a specific site).
- Click the Home Directory tab.
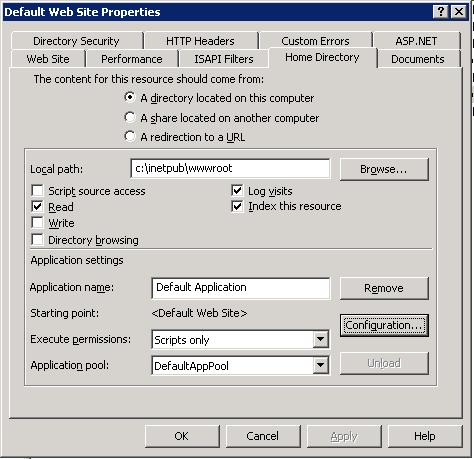
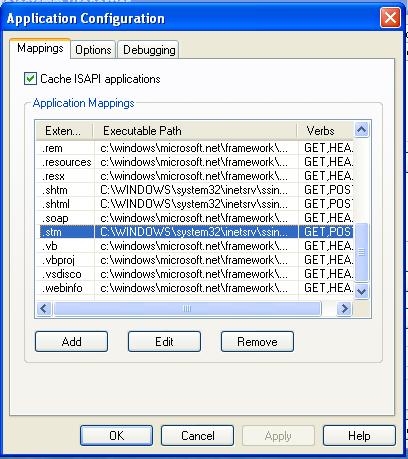
- From the Home Directory tab, Click on the Configuration button to open the Application Configuration window
-
You now need to make a choice as to which file extension you want to use for the pages that will be parsed for server side includes.
The most common extensions used are ".stm",".shtm",".shtml".
IMPORTANT: Do NOT use ".html" or ".htm"!!!
Each time a page with the target extension is requested, it will have to be read and parsed by the server.
This causes overhead. Therefore, you want to avoid have ALL your pages processed for SSI.
Personally, I like ".sthml" so we will us that for this example.
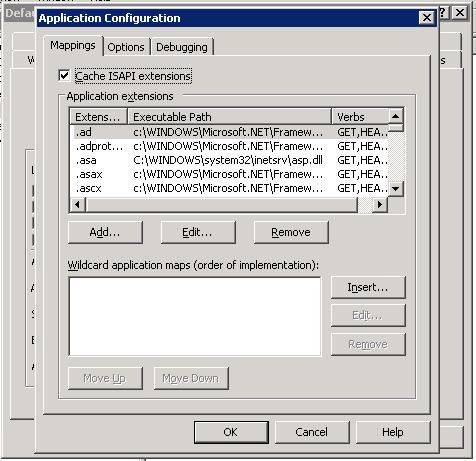
Scroll through the "Application extensions" list and find the "Extension" of ".shtml".
(If you find the ".shtml" extension, You can display its properties by double clicking on it)
If you don't find it, or you want to use a file extension OTHER than ".shtml", you will need to add it.
- To Add a new mapping, click on the Add button to open the "Add/Edit Application Extension Mapping" window.
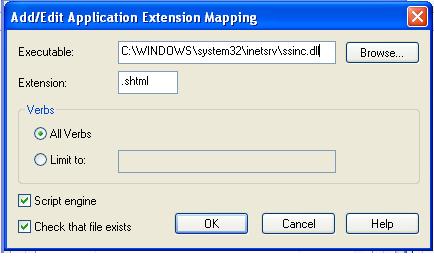
- Set the "Executable" to: C:\WINDOWS\system32\inetsrv\ssinc.dll
- Set the "Extension" to ".shtml" (or whatever file extension you will be using)
- In the "Verbs" section click to enable the "Limit to" option and enter "GET,POST" in the verb list
- Enable "Script Engine"
- Enable "Verify that file exits"
- Click "OK" to apply the mappings
- Continue to click "OK" until you get back to the default "Web Site Properties" window
You have now successfully configured and enabled Server Side Includes (SSI) for your Web Site!
You can now create documents that include SSI directive (ie: #include) and save them with the ".shtml" extension.
If you want to use SSI pages as "Default Content Pages" (IE: user supplies a URL with just a directory name and not a particular file), you will need to add an entry for "index.shtml" pages in the "Default Document" section.
- Click on the Documents tab of the Web Site Properties window
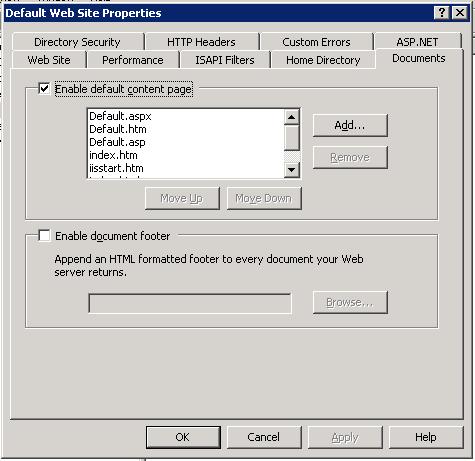
- Make sure "Enable default content page" is enabled/checked and scroll through the list to see if the "index.shtml" is present.
- If it is not, click on the "Add" button to open the "Add Content Page" window.
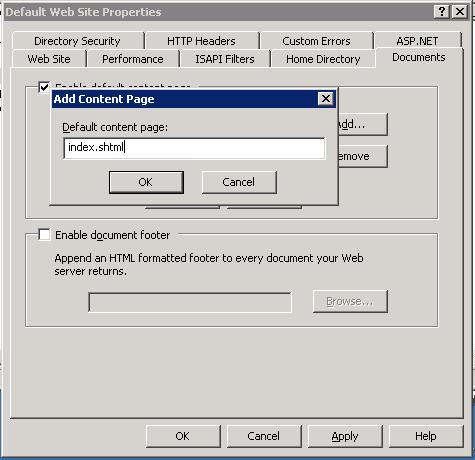
- In the the Add Content Page window add index.shtml the Default content page and click ok.
- When you return to the "Web Site Properties" window, Click on "OK" to finish.
Now, you can created default directory pages by naming the files "index.shtml" and saving them in the target directory.
To disable server-side includes on your IIS Web server, you must remove SSI extensions from the application mappings list.
If your Web server receives a request for a page and the SSI extension has been removed, IIS will not process the SSI directive within the page.
You can disable the processing of server-side include directives on all Web sites or on a specific Web site.
For more informaiton about SSI directives in IIS, see the MS KB article:
IIS Server-Side Include Directives: