ProjectSMM.com
Gonzo TechNet
How to Set Up DBMail in SQL 2005
Here are the steps necessary to setup/enable mail in SQL 2005.
This has been greatly improved and simplified since SQL 2000.
-
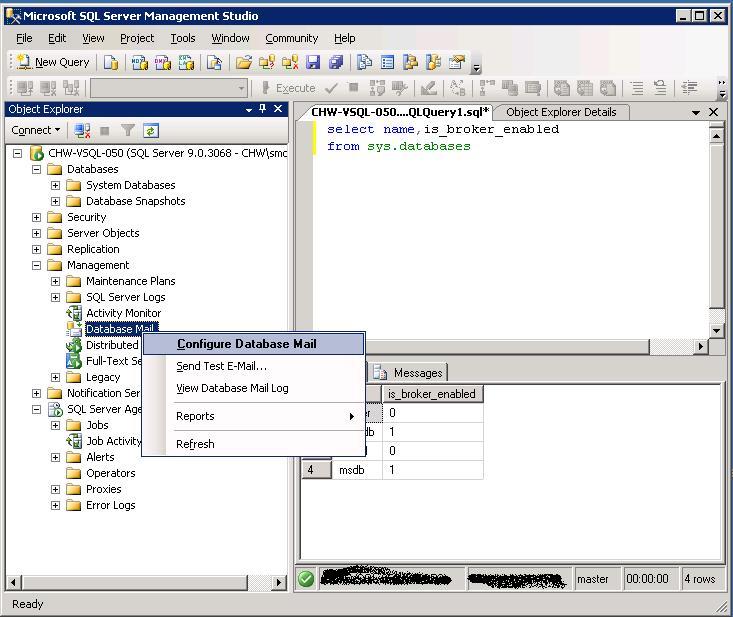
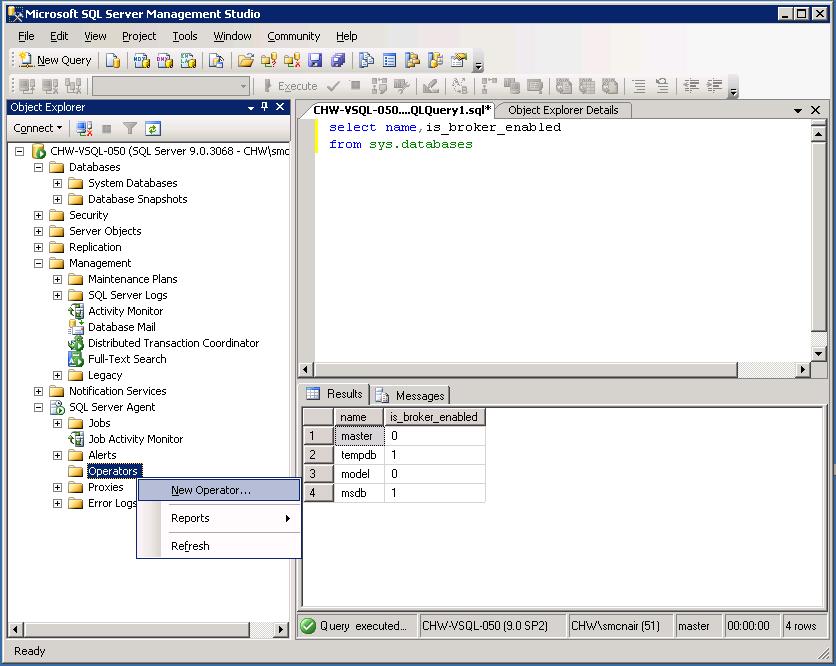
To begin, verify that that service broker for mail is enabled in the msdb database.
Run the following query in the master database:
SELECT name,is_broker_enabled FROM sys.databases;
If is_broker_enabled = 0, you will need to turn it on by executing the following:
ALTER DATABASE msdb SET ENABLE_BROKER
Note: If the command above takes a long time to execute, cancel it and execute the following command
ALTER DATABASE msdb SET ENABLE_BROKER WITH ROLLBACK IMMEDIATE
-
Once the broker is enabled, run the DBMail configuration wizard SQL Server Management Studio (SSMS)
From the SSMS console expand the Management section then right-click on the Database MAil icon then select Configure Database Mail
-
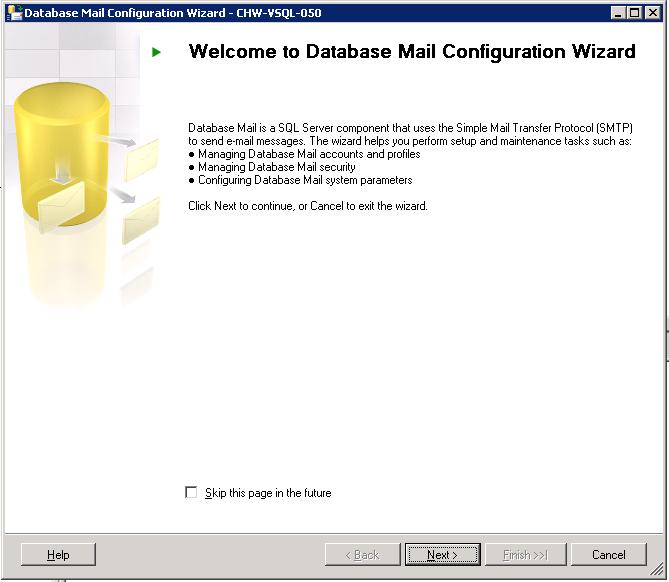
From the Database Mail Configuration Wizard screen, click Next
(This is a one-time step that can be part of the SQL 2005 VM image used by the Intel team)
-
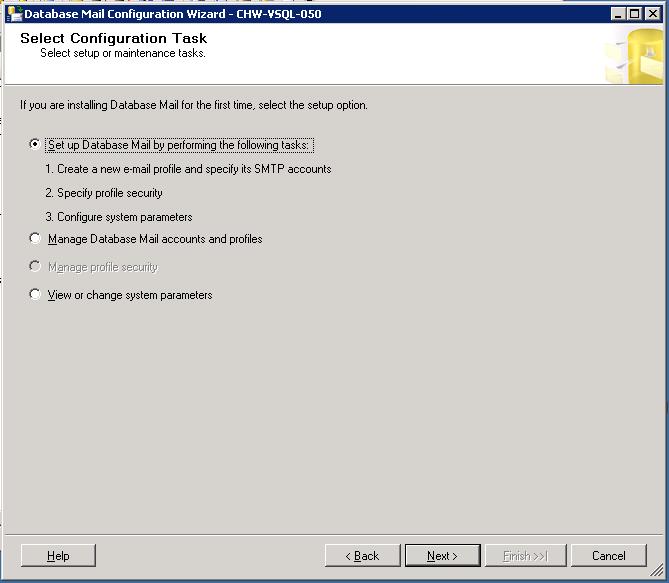
From the Configuration Task screen, select the Set up Database Mail by performing the following tasks: option and then click Next
-
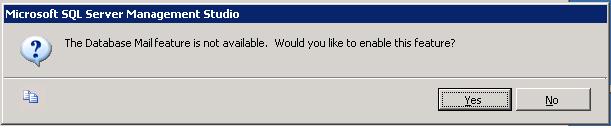
If this is the first time the wizard has been run, you will be prompted to Enable the Database Mail feature.
Click on the Yes button.
-
You will now be presented with the New Profile screen.
If no profiles or SMTP accounts have been created, you will need to create and configure them now.
In the Profile name: box enter dbmon and then click the Add button.

-
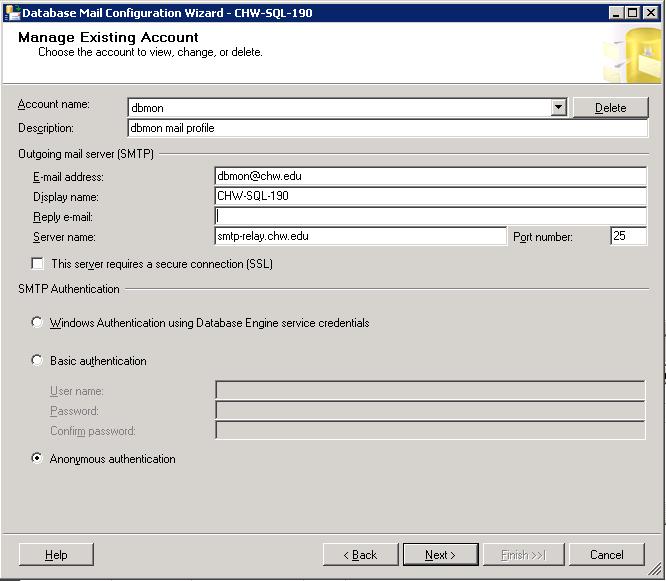
You will now be in the New Database Mail Account screen.
Enter the following values:
- Account name: dbmon
- Description: dbmon mail profile
- E-Mail address: dbmon@chw.edu
-
Display Name: CHW-SQL-xxx [Set this to the HOSTNAME!]
This is what will appear in the "From" of the emails that are sent to the operator/user.
By setting it to the hostname of the source server, it will be easier to identify which system is reporting a problem.
- Server name: smtp-relay.chw.edu
On the bottom of the screen be sure to enable Anonymous authentication and then clikc on the Next button.
-
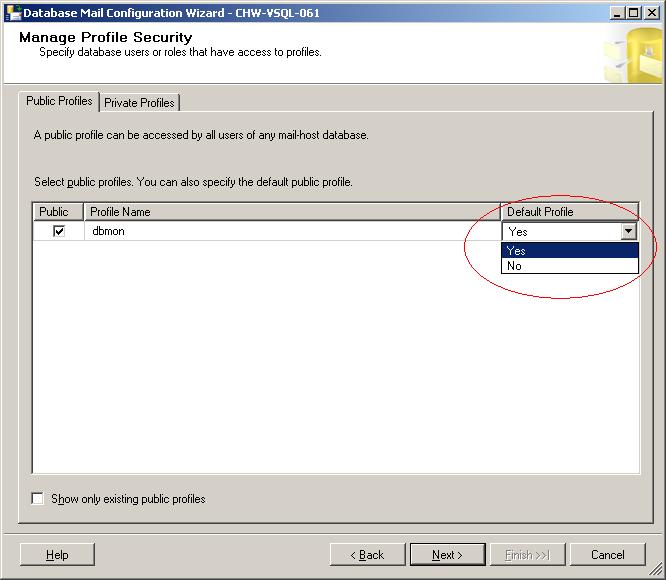
When the Manage Profile Security screen appears:
- Check the "PUBLIC" box to set the the dbmon profile as a public one
- Click in the "Default Profile" box to display the drop-down and set to YES
- Click on the Next button to save your changes and continue
-
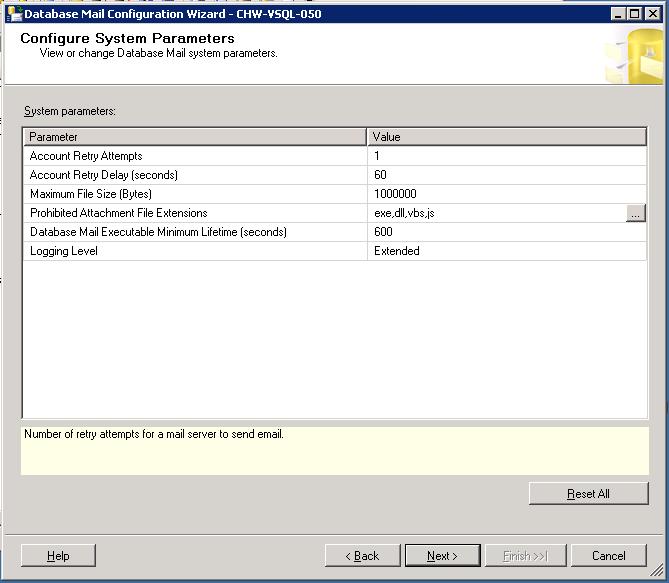
The wizard will now configure the system parameters for the profile and account.
When it completes, click on the next button.
-
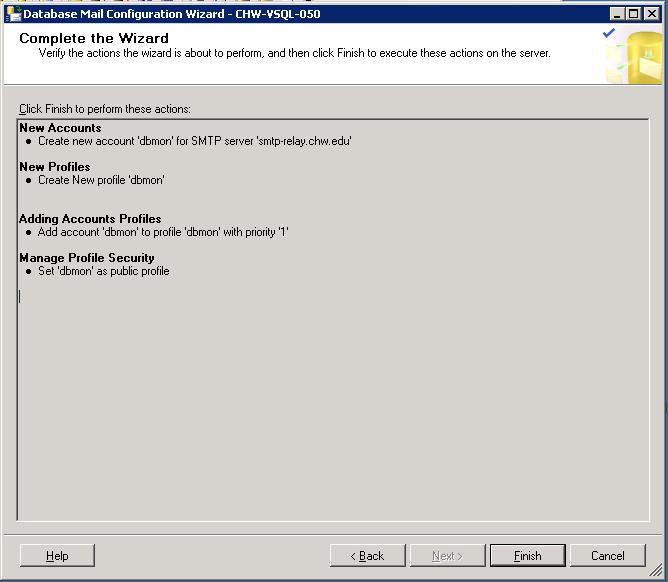
The wizard will now display the actions it will be performing.
Verify the the information presented and click on the Finish button to continue.
-
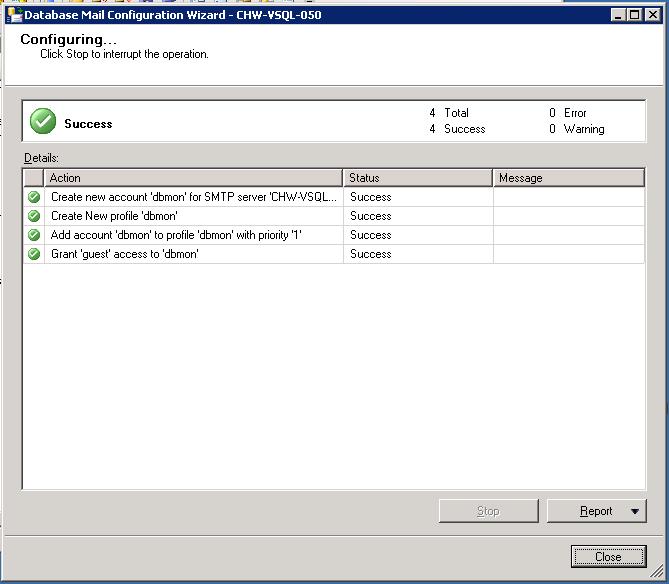
When the wizard completes the configuration, click on the Close.
-
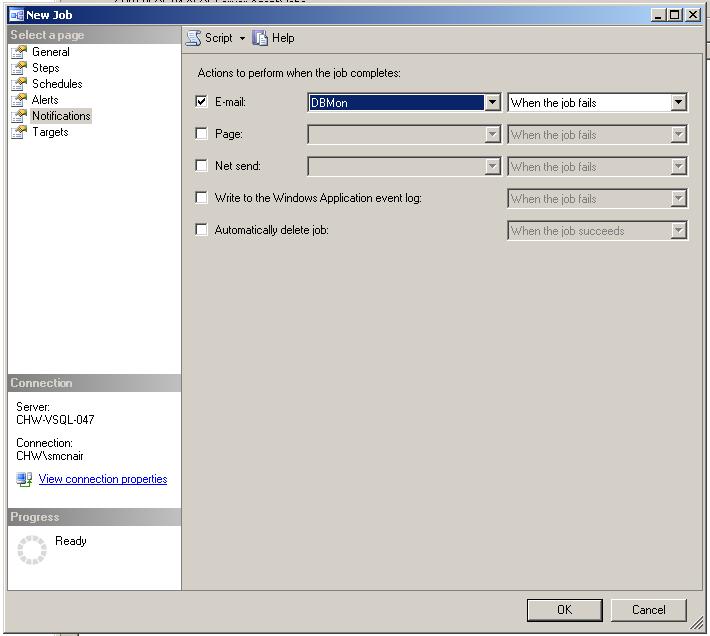
Once you have completed the database mail configuration, you will need to create a new operator.
From SSMS, click on the SQL Server Agent icon to expand it, right-click on the Operators icon, then select New Operator.
-
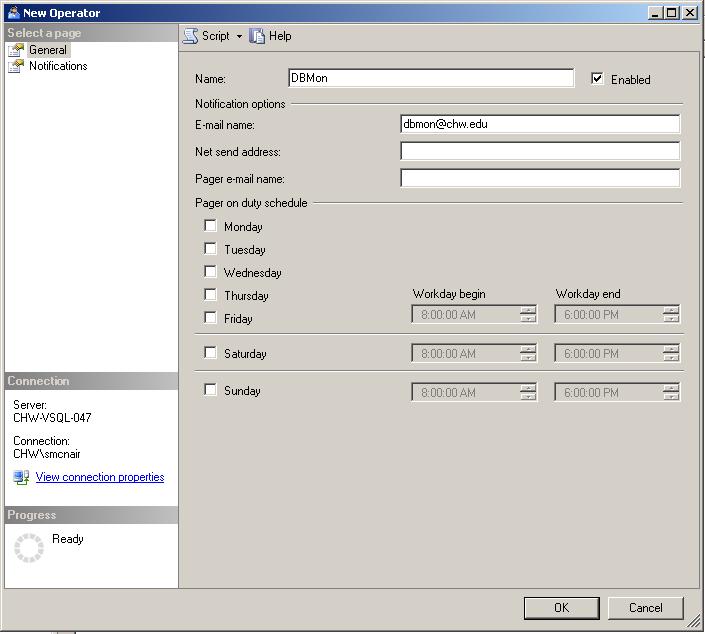
From the New Operator screen, enter the following values:
- Name: DBMon
- Check the Enable box
- E-mail name:dbmon@chw.edu
When you are finished, click the Ok button.
-
Once you have completed creating the Operator, you will need to enable and configure the mail session for the SQL Server Agent.
In SSMS, expand right-click on the SQL Server Agent and select properties.
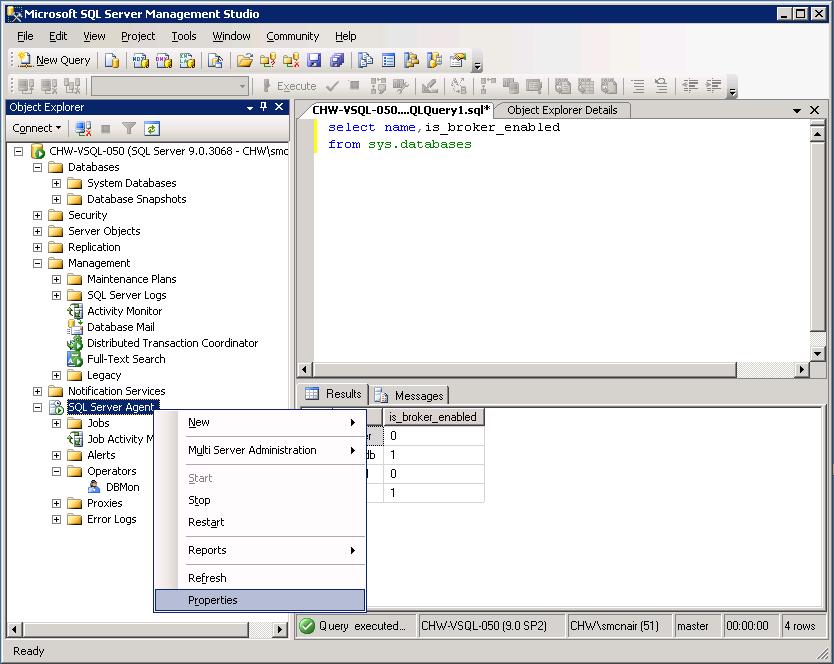
-
In the SQL Server Agent Properties window, click on the Alert System icon to display its properties and set the following values:
- Check the Enable mail profile box
- Set the Mail system: to Database Mail
- Set the Mail profile: to dbmon
- Check the Include body of email in notification message box
-
Check the Enable fail-safe operator box.
(This will allow the system to send a message to 'someone' if a job fails and no operator has been defined)
- Set the Operator to dbmon
- Set Notify using: to email
- Click [OK] to save your changes

-
***CRITICAL****
You MUST now RESTART the SQL Server Agent for the changes to take effect!
You have now successfully configured the SQL Server for Database Mail.
To test your configuration, perform the following steps.
-
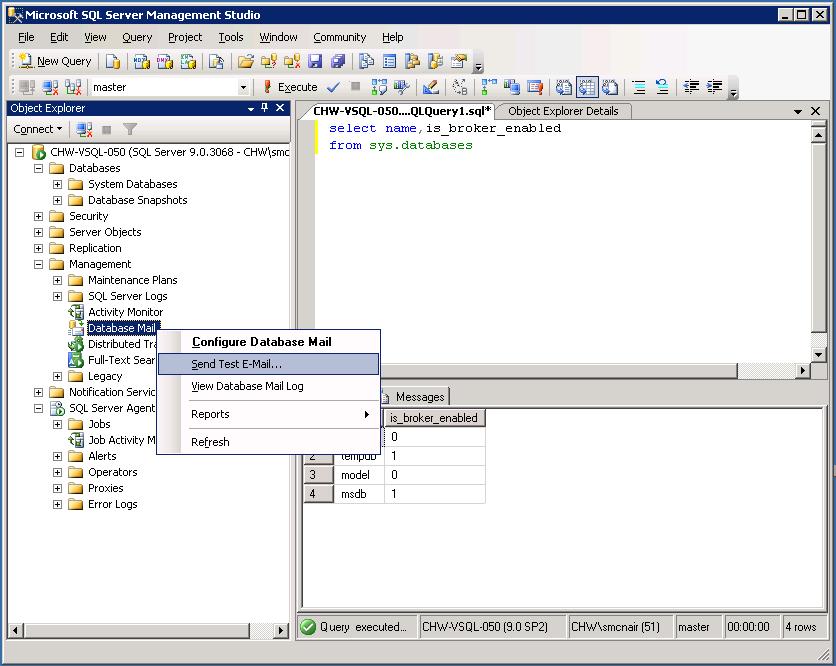
In SSMS, expand the Management tab, right-click on the Database Mail icon and select Send Test E-Mail...
-
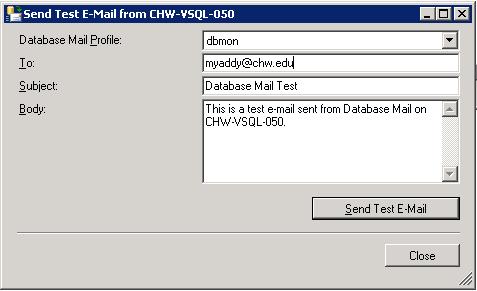
From the Send Test E-Mail screen, enter your email address in the To: field, then click on the Send Test E-Mail button.
A screen will then appear informing you of the system's attempt to send a test e-mail.
In a few moments you should receive an email.
Using the newly simplified features of SQL 2005 DBMail makes the complexity of writing CODE and individual steps for EACH SSA job to use Blat email obsolete.
In the future, each time you create a new job, you set the failure notification to the Operator(DBMon) you created in the previous steps.